8 WAYS TO CHECK LAPTOP RAM
- Check Laptop Stickers
- Check BIOS
- Check RAM Stickers
- Computer Property
- Check the DirectX Diagnostic Tool
- Use CPU-Z
- Through Spacy
- Windows Settings
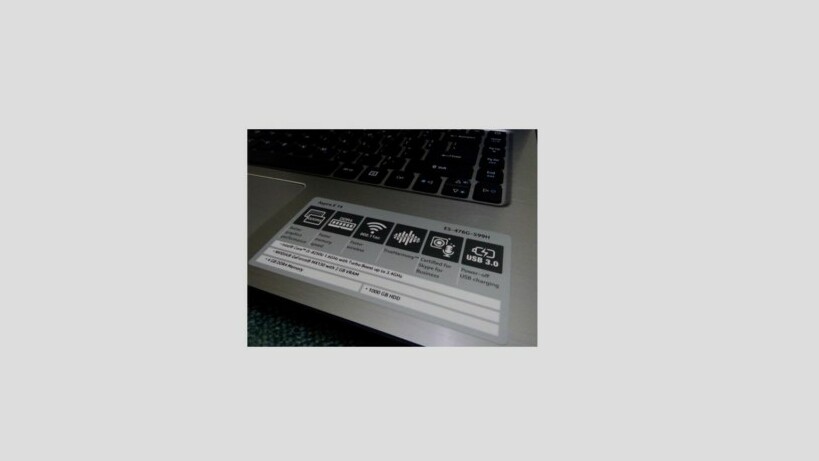
Check Laptop Stickers
How to check laptop RAM is the easiest to do and does not require many steps and turns on the laptop by checking the laptop’s default sticker. You don’t even need to disassemble the laptop to find out about the capacity and type of RAM.
Usually, this information is found on the laptop next to the keyboard, however, the information contained on the sticker may be inaccurate. Usually, the sticker attached contains 2GB of RAM information, but the RAM on the laptop may have been added or even reduced.
Check BIOS

To enter the BIOS, you must first turn on the laptop by pressing the special button, depending on the type of BIOS. AMI BIOS can generally be accessed by pressing the Del key, then InsydeH20 by pressing the F2 key.
The BIOS contains complete information about the system used on the laptop, including one of which is RAM. Please note that the information contained in the BIOS is quite accurate because it matches the capacity of the RAM installed on the laptop motherboard.
Check RAM Stickers

If you use this method it is possible to have to open the bottom casing on the laptop, if it is possible. RAM found on several types of laptops can be known very easily, such as opening a special panel on the bottom of the laptop.
However, not all laptops have this feature, many laptops require you to open the entire casing to find out the RAM capacity in it. There is a sticker on the RAM that shows information about its capacity.
The sticker affixed to RAM not only contains the capacity of the RAM, but also the type and brand. This sticker is usually integrated with the warranty seal and sticks to the RAM chip.
Computer Property

To use this method make sure your laptop has the Windows operating system installed, the way to check the RAM installed on the laptop is to press the Win + Pause button. After that, you will be confronted with the system information.
System information contains information about not only RAM capacity but also how much capacity can be used. Keep in mind that not all RAM can be used by a laptop depending on how the laptop is adjusted.
For example, you will install a laptop with 4GB of RAM while the operating system used uses 32-bit architecture. So, you can only use the maximum RAM is no more than 3.3GB.
Check the DirectX Diagnostic Tool

Information about RAM you can also get through the DirectX Diagnostic Tool, this method can be done by pressing the Win + R button, then run the RUN application. Then, type ‘dxdiag’ (without using quotes) then press OK, besides that you can search by typing ‘dxdiag’ in the Start Menu.
If you have done the above method then a window or layer will appear containing information on your laptop. How to check laptop RAM using this method is very often done for those who are struggling in the IT world.
Use CPU-Z

If you use this software not only information about RAM but also all processor information, graphics, and much more. CPU-Z will display all information about RAM, starting from the capacity, type, and brand, however, you have to go through several steps to use this method.
You can download CPU-Z for free on your laptop or computer, no need to worry about the size of this software, this is because the developer has provided a portable version or you don’t have to install it first when using.
Through Spacy
Spacy is an application that is easy to use to find out what components are contained in a computer, be it hardware or software to the operating system used. Including the easiest and most accurate way to check laptop RAM.
How to use it is very easy, you can simply double click on this application if you have installed it on your laptop. If so, wait a few minutes, and then Spacy will provide all kinds of information related to the components in your computer device including RAM capacity.
Windows Settings

Using Windows Settings is probably the way to check the most recommended laptop RAM for you. Because besides being very easy to do, this method is also very accurate in providing information about anything on your computer or laptop.
The trick, enter the control panel, select the system and security then enter the system. If this is still difficult for you, use the Windows + Pause Break key combination on the keyboard. After that, a window will appear on the laptop screen that contains information about the laptop, one of which is the RAM capacity.
RAM capacity can be an important aspect of your judgment in choosing a laptop, the greater the capacity you have it will usually also have an impact on the price of the laptop. This is what makes RAM capacity is an important point that you must know.